Pin It

Sunday, December 14, 2014

Sinterklaas and Holidays around the World!

On Friday, December 5th Sinterklaas came all the way from the Netherlands to visit our students! It was such a cute activity and we used it to kick off our holidays around the world event. On the morning of December 5th, we asked the students to leave their shoes outside the classroom because Sinterklaas was coming over to leave special treats to the good boys and girls and a black stick to those that don't behave well.
The kids were very excited! We gathered on the floor and I shared with them a PowerPoint presentation about Sinterklaas. We sat very quietly waiting to hear Sinterklaas' horse coming down the hall, but unfortunately he was too quick and silent for us to catch him! He left treats for all of the kids! After we wrote about our adventure!
This was a great start to our Holidays around the World Unit! To get the kids excited about our travels, I made them suitcases, plane tickets, and passports. We also had a traveling diary to document all the things we learned about. It was a fun learning experience and the kids enjoyed it very much! 
Inside the passport we listed all the countries we were going to visit. Each teacher chose a country and the kids rotated between classrooms. During their visit, the kids got their passports stamped, heard a quick presentation about the country, and did a craft activity. They also located the places they visited on a world map that was attached to the inside of their suit case. They also had a Ziploc bag to collect all their projects.


Sunday, November 9, 2014

Book Character Day!

Last Friday we had our yearly Book Character Parade for all of our Kindergarten and First Grade classes and it happened to fall on my birthday! It was a lot of fun for everyone involved! Every year I try to dress up as a different character and all I wanted for this year was to be Ms. Frizzle from the Magic School Bus. It was a funny story because I was struggling to find a fabric with planets on it. I found one with tiny planets, so my dress looked like it had polka dots from far away. I was about to give up until we had a meeting at the media center the day before and I saw a frame made out of fabric with big planets on it! I asked our media specialist if I could have it, and she was kind enough to give it to me. Now I have to make something nice for the media center to repay the favor! ;) My dream of becoming Ms. Frizzle was becoming a reality!
What can I say? I get as excited as my students! I am a kid at heart!

In order to participate in the parade, the kids have to complete a project. They have to make a puppet of their favorite character using a small paper bag, complete a story map, and an introduction page.

Here is an example of the puppet and the introduction page:


My daughter is in first grade, so we got to spend the day together. This year she was Spookley the Square Pumpkin:

 I was Ms. Frizzle!

 Last year we dressed up as Stellaluna and her mother:


Character day is one of my favorite days!

Tuesday, October 28, 2014

Red Ribbon Week

This week we are celebrating Red Ribbon Week and we are enjoying it to the max! Our job as teachers is not only to prepare our kids academically, but to guide them and teach them how to be great members of society.

Each day we have a different theme:

Monday - I "mustache" you not to use drugs - every student was given a mustache to wear
Tuesday - "Wacky Tacky Day" - students wear mismatch clothes
Wednesday - I'm a "Jean-ius," I'm drug free - students wear jeans
Thursday - "Shade Out" drugs - students wear sunglasses
Friday -  My Future is Bright - students wear their favorite college shirts
 
(In this picture I am with my amazing students intern . I am really enjoying having her around. She is amazing and I cannot wait to see her with her own class. Those kids are going to be lucky to have her as a teacher) 

Now to continue with Red Ribbon Week - We are also having a door contest and these are some of the doors my team came up with. Mine is the first one. They will announce the winner on Thursday!
You cannot see it well, but each kid drew himself/herself as a snowman and we used cups to make it look like snow globes. We also added glitter to make it look like the real thing. It really looks cute and the kids are very proud of their door.


Thursday, September 18, 2014

Interactive Notebooks

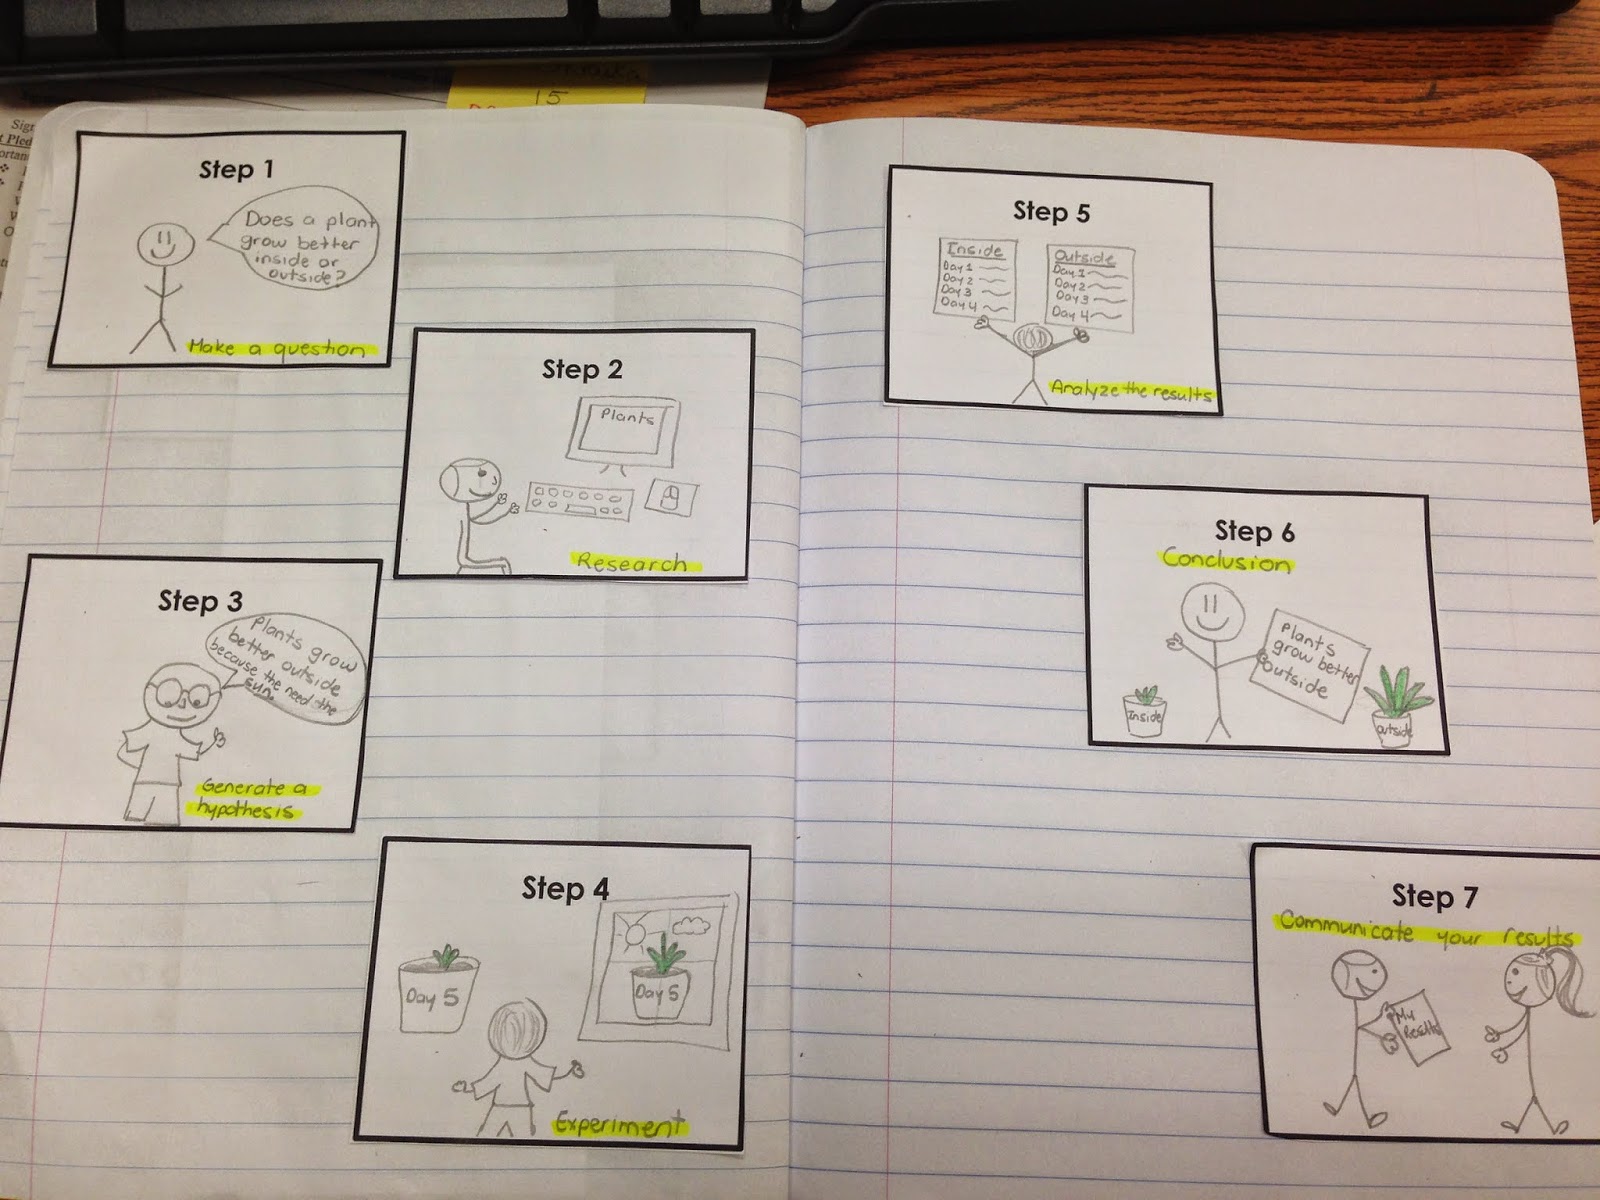
This year I started using Interactive Notebooks during science and the kids and I love it! I figured it was a perfect way to keep track of everything we are learning and also use these notebooks as a review for the End of the Course Exam (this year our students will take end of course exams in Reading, Math, Science, PE, Music, and Art).

Usually when I give my kids worksheets back, they all end up in the trash. So this way, we are keeping them there for the rest of the year. When I make an activity for the notebooks, I always include the standards. That's another way for me to show my administrators that I am teaching the standards.

Here is a free product that I used this week when I taught the Scientific Method:

http://www.teacherspayteachers.com/Product/The-Scientific-Method-1447969

Enjoy!


Friday, September 12, 2014

Differentiated Centers

Creating centers is probably one of the hardest things to do because you want to make sure the activities are meaningful and effective. You want the kids to be able to complete them on their own so the teacher can work with small groups. At first it was a nightmare for me, but then I developed a system that works and I actually enjoy preparing these centers for the week.  My centers are designed to target all aspects of reading (phonemic awareness, phonics, fluency, vocabulary, sight word recognition, grammar, and comprehension) while also following the theme of the unit. These centers are also differentiated to challenge and support my learners.

Here's what I do and how my centers look like:


This is the "switcher board" -  I assign a student to move the cards down every time the timer goes off (every 15min.). By having a student take care of it, I avoid interruptions while I work with my guided reading groups.

This is my writing center - if you look at the corners of the table, you'll see the instructions taped to the table and they go day-by-day. You will also notice colored dots.  Those represent my guided reading groups.  The green and red represent "on-grade," so they complete those activities. That's where everybody starts.  Next to the blue dot is the "Challenge Yourself" activity - for my "above grade" students or any student that completes the other activities successfully and want a challenge. The yellow dot has easier activities for my struggling learners.  

Monday - Trace the shape and write the word family, write a sentence using one of the words
Tuesday - Play the writing game (cards on the table)
Wednesday - Answer the story-related questions in complete sentences in your writing journals
Thursday -Use a picture card (I got pictures out of magazines) and write 3 sentences about it on the chalkboards - the kids love these and I got them at the Dollar Tree! 
Friday - Handwriting notebooks (I make my own with paper and highlighters). This is how I can help my students improve their penmanship! 

This is what I have written next to the blue dot and yellow dot:

(blue dot) Challenge Yourself! - 
* Use 5 of the spelling words and write a story.
* Write a letter to a friend or family member using at least 1 of the words.

(yellow dot) Is the work too hard? That's okay - try this:
* Ask a friend to help you complete the activity.
* Draw a picture of each spelling word.
* Use the words that you know and try to write sentences. 


This is my Word Work Center
Once again, I have the daily directions written in the corner of the table. Each day they have a different activity. 
Monday - Rainbow words - write the spelling words using different colors
Tuesday - Stairs (for example: clap)
c
 cl
   cla
    clap
 Wednesday - Make the spelling words with magnets
Thursday - Make the spelling words with play-doh
Friday - Write sentences using the spelling words

Differentiated section: 
Challenge Yourself!
* Get a magazine and try to find the spelling words.  If you can't find them, make them using the letters from other words. Draw a picture of each of the words.
* Complete the Word Mat for each of the words. (It asks for sentence, word, picture, antonym, and synonym).  

Is the work too hard? That's okay - try this:
* Ask a friend to help you complete the activity.
* Make a list of all the letters you know and draw a picture that starts with that letter.


This is my vocabulary center - the directions are taped on the table.
Here they play games, read books, and complete activities using the weekly vocabulary words that come from the Anchor Text.

This is my Daily Focus Center - Here the kids play games that go along with the grammar skill of the week. The kids also use the iPads when they visit this center.

I forgot to take a picture of my listening center and computer center. These centers are self-explanatory. When they go to computers, they have to visit Imagine Learning because they are all ESOL and that's a requirement. In my listening center I use stories and other listening activities that I have purchased that go along with the skills of the week.

Even though I have directions for each center, these centers are differentiated to meet the students' needs. I also pair them up so the struggling learners get peer support and the high achievers get challenged by having to explain and "teach" the activities to their peers. 

Many of the games we use in my classroom I make them. If you like them, please visit my TPT store. : )


Tuesday, September 9, 2014

New Year, New Classroom

I have been in the same classroom for 9 years, so it was about time to pimp-it-up! I spend long days there and I wanted it to feel inviting and bright. Our school mascot is the Owl, so I continued with the pattern and used owls...plus they are so cute! Just by making a few changes, my classroom came to life! This year I added curtains (to hide my mess) and shams to make it look homey. My amazing aunt made them for me. She also made me seat covers, the lunch count and job chart. I love how my classroom looks now!
This is my lunch count and job "chart" - tree

That messy area is my desk (It was the 2nd day of pre-planning, so a little messy) ;)
But it is even worse behind those curtains! 

 This is my classroom ready for Meet-the-Teacher

During Meet-the-Teacher, the students selected their lunch stick, behavior owl, job owl, center figurine, and got to choose their table. In the back you can see the t-shirts I make them so they can wear them during field trips and special occasions.

I am very excited about this new school year and I know it is going to be the best one yet! 
Best of luck to all my fellow teachers!


Movie Star Ending!

It's been a while since I updated my blog! I had few rough months, but I am back!  I wanted to share with you some of the pictures of my End of the Year Party 2014. As you probably noticed, I take very seriously my last party with the kids. I love to send them off in style!  Last year's theme was "Super Stars." I had so much fun planning and decorating the classroom, but the best part was seeing the kids all dressed up as if they were going to the Oscars and seeing their surprised faces when they saw the decorations.  It was truly a time to remember!


 and off course I had to dress up too! ;) 

Tuesday, April 22, 2014

Earth Day!

Today is definitely one of my favorite days at school! I love teaching the students about Earth Day and the things we can all do to protect our natural resources. I guess it is my chance to help Earth by creating awareness. My students enjoyed today's activities and became "Earth Rangers!"

We started by reading books and watching videos on www.brainpopjr.com about Earth Day and Natural Resources. We then created a book about the different resources (water, sun, mountains, trees, etc.).  This was an idea a good friend shared with me.

Here are some pictures:
Here you can see the book cover, our greenhouse template, and some worksheets we completed. Kids used markers and coffee filters. They colored the coffee filters with blue and green markers. Then we sprayed them with water and let them dry. They looked great!

If you like the worksheets, please visit my TPT store at:

http://www.teacherspayteachers.com/Product/Celebrating-Earth-Day-Reduce-Reuse-Recycle-655198

I also have this product in Spanish:

http://www.teacherspayteachers.com/Product/Cuidemos-de-la-tierra-reducir-reusar-reciclar-655610


 Here is the inside of the book. Each page is a different Natural Resource. Blue - represents the water (Clear blue water), green - trees (Tall trees),  brown (Mountains tall), yellow - (The shinning sun), light blue - (Beautiful skies).


We also made Earth necklaces (this was another idea a friend shared with me). They did not dry on time, so we are going to paint them tomorrow. We used soil and liquid glue. We mixed them together and made the balls. I let them dry for a few hours and then used a paperclip to string the yarn. Tomorrow we will paint them with blue and green paint (to look like the planet Earth).


Last week we made our Greenhouses to see how plants grow. Somehow when I use soil, my seeds never sprout. This is the only way they grow for me. The kids loved seeing the parts of the plant and the "water cycle in-a-bag." You can see the front of my greenhouse on the first picture of this post.


Hope you liked these ideas and happy Earth Day!!!!